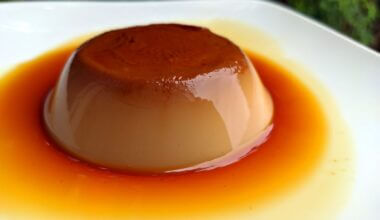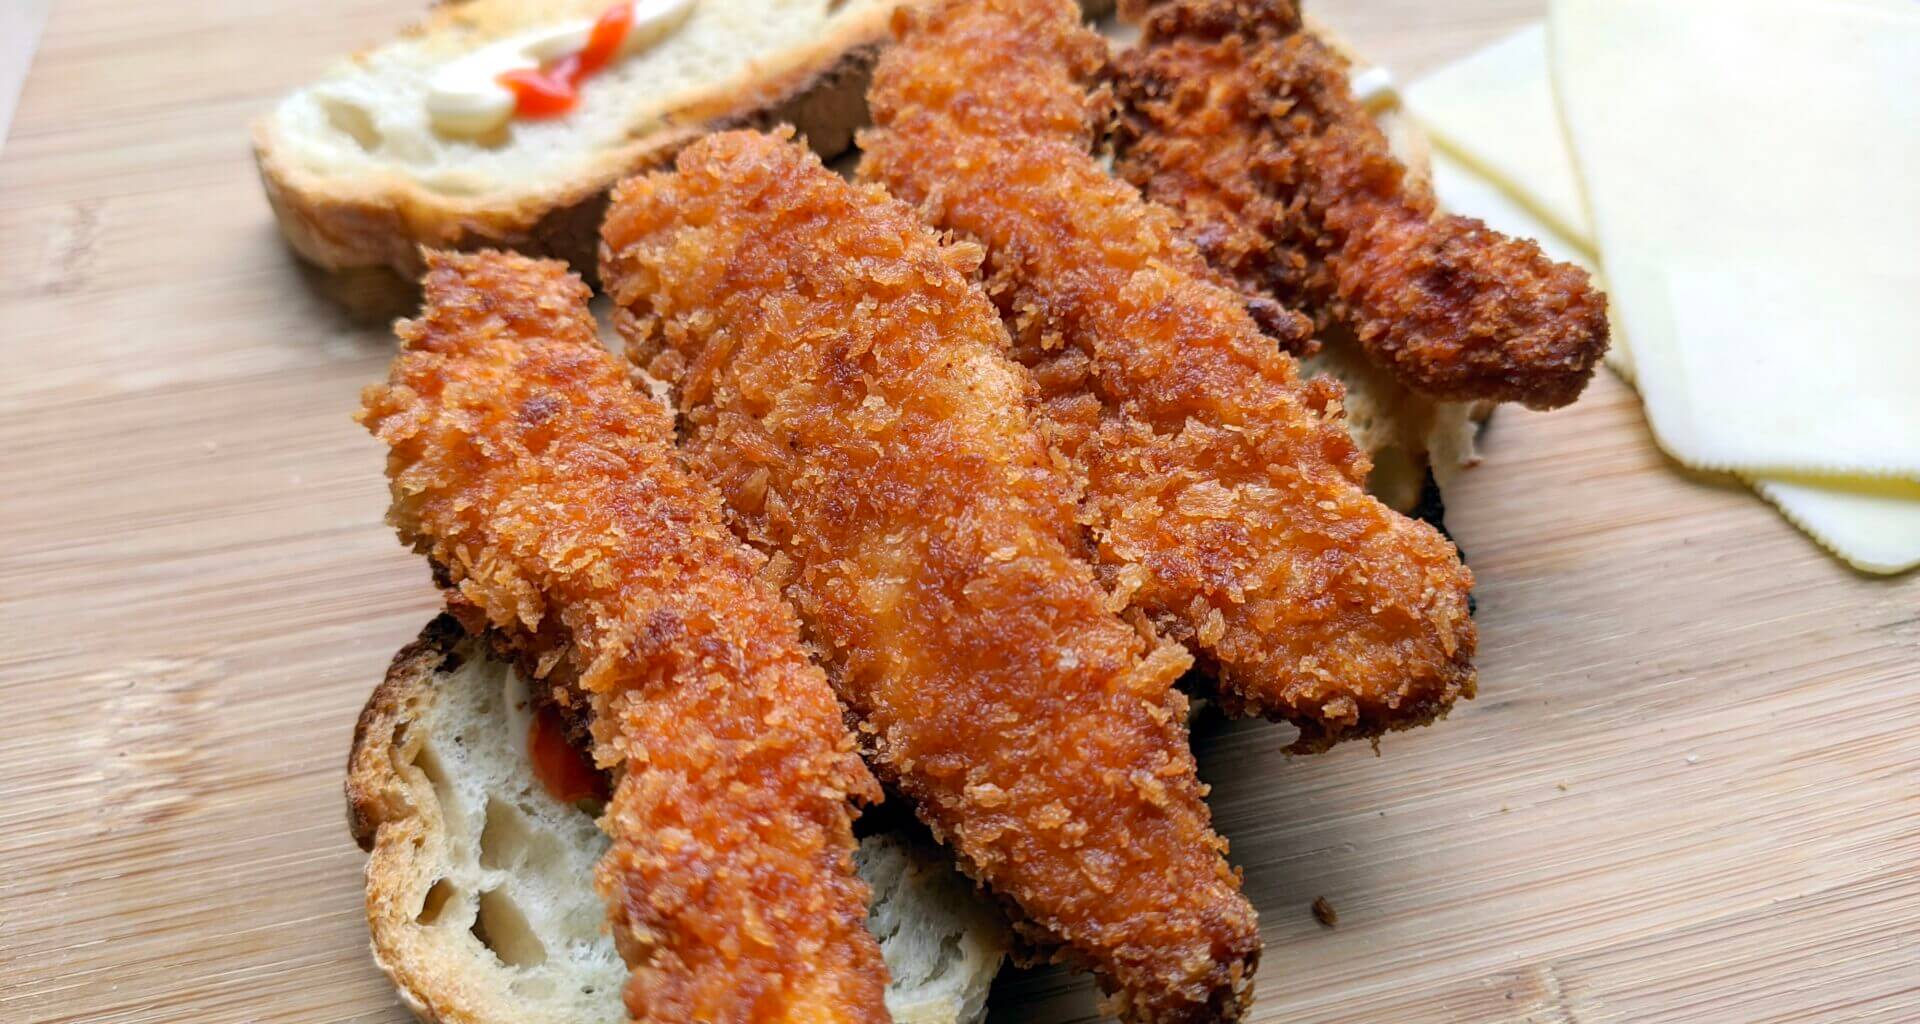
Who doesn’t love a perfectly golden, crispy breaded cutlet? Breading and frying is an excellent way to create another texture and flavor on the outside of an ingredient, and if you’re working with something delicate like fish, that breaded coating helps create a protective layer that shields it from the intense heat while also improving the stability of the fish after it’s fried.
But is it just a matter of coating and frying, or is there more we can learn about the breading process? Well, there’s actually a lot that goes into properly breading and frying food. I’m going to break this down into techniques and tips for making perfect breaded foods. These won’t be in any specific order, but rather ideas and concepts to keep in mind for 99% of your breaded preparations. Let’s dive in!
Understanding the Magic of Frying
Before we get into the nitty-gritty of breading, let’s talk about what actually happens when you fry. Frying involves submerging food in hot oil at temperatures between 160ºC to 190ºC (320°F to 375°F) anything less is more like poaching in oil. This rapid boiling in oil makes food moist on the inside and crispy on the outside, cooking quickly while protecting the ingredients.
When food hits that hot oil, the surface heats up rapidly, causing a quick change in the proteins on the surface. This creates a limited flow of the water that’s inside the food, resulting in that coveted crispy exterior and perfectly cooked interior. Here’s the kicker: while the hot oil provides the intense heat, it’s actually the steam inside your food that does a lot of the cooking. As the food hits the hot oil, the surface moisture instantly turns to steam. This rapidly expanding steam not only cooks the interior of the ingredient but also creates a protective barrier, preventing the exterior from burning. However, once that moisture is gone, that protective shield disappears, and your breading can quickly go from a perfect golden brown to burnt.
Essential Breading Techniques
Choose Your Breadcrumbs Wisely
While most people just grab store-bought breadcrumbs, there’s actually a whole world of bread coating options out there. You’ve got Japanese panko, crushed saltine crackers, cereals, seeds, and you can always grab some day-old sourdough bread or any type of bread, dry it out a bit, and grind it finely for a custom bread coating and with sourdough you get that tangy flavor.
Also different breads create different coatings. For example, panko creates a more crunchy, lighter-colored coating compared to regular white breadcrumbs, which create a smoother, more golden-brown coating. You need to be careful with frying times because the ideal color and timing will be different for each type of breading.
The Three-Step Breading Process
Breading almost always involves three elements (I say “almost” for good reason). Typically, you need a dry base (flour or starch), followed by something wet (egg, milk, buttermilk, water), finishing with the breadcrumbs (which can vary). However, if your base ingredient is already pretty dry, you might not need the flour step. But it’s always a good idea to use a little flour just to dry the surface even more and create a base that the egg or milk can grab onto more easily. The combination of both acts like cement for the breadcrumbs to stick to.
Season Every Component
Yes, it’s an excellent idea to season the flour, the egg, and the breadcrumbs because you’re building even more flavor into your fried food. It doesn’t have to be just salt, think about ingredients that can handle the heat of frying and will enhance the aroma of the coating. Things like salt, pepper, cayenne, hot paprika, dried herbs like parsley or cilantro, garlic powder, parmesan cheese, or even adding soy sauce or hot sauce to your beaten egg can give another dimension to your fried food.
Season the Main Ingredient Too
Similarly, it’s smart to season your main ingredient. It might be simple salt and pepper, but if you’re working with something like cod, seasoning it with lemon juice gives a delicious contrast to the fish, if you want to use fresh herbs its best to add them to the main ingredient than on the coating where there is a higher risk of burning.
Always Dry Your Main Ingredient
This is why using flour is so important, you should thoroughly dry the ingredients you’re going to fry. Fish, chicken, and vegetables tend to release a lot of water, and they won’t fry properly if they’re wet and the breading wont stick property if they’re wet. That’s why it’s crucial to dry them with paper towels before they hit the flour.
Professional Frying and Breading Tips
Don’t Overcrowd Your Pan
This is rule number one for all fried foods, but it’s worth repeating. Don’t stuff your skillet or deep fryer, this will drop the oil temperature too much, and your food won’t fry properly. It can also cause your breaded pieces to stick together. Try to add pieces at about the same time that are roughly the same size so they’ll cook at the same rate.
Watch Your Oil Temperature
Don’t let your oil get too hot. Since breaded foods brown more quickly on the outside, you risk having a perfectly golden exterior before the interior is fully cooked. The ideal temperature for most fried foods tends to be around 155ºC (340°F). If you’re not sure, use a frying thermometer.
You can also test the temperature by dropping in a few kernels of corn, when the corn pops, your oil is ready. Or look for when the surface of the oil starts to shimmer slightly and gives off a light, dry steam. You can also add a bit of bread or a woden cooking spoon if these start to bubble and fry its about the right temperature.
Taste the First Batch
This is another general rule for frying, but it’s especially important with breaded foods. Taste the first pieces that come out, just a small bite will do. to see if they’re cooking completely through and if the seasoning is right. This way, you can adjust the oil temperature and seasonings for the remaining pieces.
Drain Properly
When it’s done, remove it with a slotted spoon and transfer to paper towels or drying rack. This will drain the excess oil from the exterior but will also help make the breading crispier and less greasy.
Don’t Overstuff (If You’re Making Stuffed Items)
Just like any stuffed pastry, too much filling can cause it to burst open, and then your filling ends up in the oil or simply leaks out everywhere. A croquette or stuffed cutlet follows the same principle, it’s important not to overstuff and to seal well before breading and frying.
Serve Sauces on the Side
Sure, lemon or sauces with breaded foods are delicious, but serve them on the side. Adding lemon or sauce directly on top of breading will immediately start absorbing the liquid and getting soggy, and nobody wants that. The exception might be in a sandwich situation like fried chicken, but even then, try to have one side in contact with something dry so you always have at least one crispy side.
Double-Dipping for Extra Crunch
Can you go through the whisked egg twice? Absolutely! If you want a really thick coating, it’s a great idea to go flour -> egg -> breadcrumbs -> egg -> breadcrumbs. This works best when your flour or breadcrumbs are seasoned because you’re adding extra thickness, crunch, and flavor to your breading.
Press It In
Especially with panko, which tends to have larger pieces, it’s always smart to gently press the ingredient into the breadcrumbs and then shake off the excess. This ensures the coating is well-attached to your food. Depending on what you’re breading, after coating with breadcrumbs, you can even gently squeeze it or place it between two sheets of parchment paper and roll it lightly (great tip for flattened chicken cutlets or pork schnitzel) so it lies flatter and the coating adheres better and fries more evenly.
Get Creative with Your Wet Component
For the liquid step, you can use milk, eggs, or whatever you want. A really popular fried chicken recipe calls for a mixture of milk, eggs, and pickle juice for the liquid component. So don’t be afraid to experiment. Milk and eggs are common because they tend to be a bit stickier with flour, but there’s a lot of things you can try to explore.
Finish Large Items in the Oven
Some fried foods, because the ingredient is too large (like a whole chicken thigh), don’t have enough time for the interior to cook through while achieving that perfect golden coating. To avoid burning the breading, remove the chicken from the fryer before it’s completely done and finish it for a few minutes in a hot oven.
You Don’t Have to Deep Fry
Of course, breaded foods are best when deep-fried, but it’s not mandatory. You can always season your breadcrumb coating with a little oil and bake it in a hot oven. Sure, it won’t be quite as crispy, but since it takes longer to cook, it will be a bit firmer and less moist because it didn’t absorb the fat from frying. Depending on what you’re making, you can also shallow-fry in just a little oil, especially if it’s a thin cutlet. Or yes im saying if, use a air frier (that is basically a fan assisted oven).
Storage and Reheating Tips
You Can Bread and Freeze
Yes, 90% of the time you can bread your ingredients, wrap them up, and freeze them, then fry them straight from the freezer. For most ingredients, this works perfectly fine. In fact, you can cook half your breaded items and save the rest frozen for later (there are a few exceptions, seafood should be consumed immediately and not refrozen).
Don’t Bread and Refrigerate
After breading, you want everything dry so it stays crispy. Refrigerating breaded items will cause the coating to absorb moisture from the food and the air, making it soggy and risking the coating separating from the ingredient. It’s better to keep your main ingredients in a marinade (before adding the breading) or the freezer until you’re ready to fry.
Don’t Fry and Freeze
I know some frozen foods come pre-fried, but for homemade breaded foods, this isn’t a good idea. The frying process is also a drying process, and taking something already fried back to the freezer is essentially drying it out again. Then even if you don’t fry it again, just reheating will dry it out even more, you’ll never have decent breaded food this way.
The Best Way to Reheat
The best way to reheat fried breaded foods is in the oven at medium temperature. It won’t get as crispy as when it was fresh, but it will help the oil that’s absorbed in the food to fry a little more and dry out a bit. This is much better than reheating in a skillet where there’s more risk of burning the coating.
Essential Frying Oil Knowledge
Choosing the Right Oil
Different oils work better for different applications. If you’re doing a lot of heavy frying (like 5 pounds of french fries), choose a super-resistant oil like canola. For most frying, sunflower oil is the most versatile with the most neutral flavor. But if you’re making fried rice or Asian-style dishes, oils like sesame or peanut can add an interesting and very authentic flavor.
Oil Temperature Guidelines
Controlling the oil temperature is key to achieving perfectly fried food. Using a cooking thermometer is the most reliable way to ensure your oil is at the right temperature. Here are the ideal temperature ranges for common fried foods:
- French Fries: For the classic two-stage frying method, fry them first at a lower temperature of 130-150°C (265-300°F) to cook the potato through. Then, fry a second time at a higher temperature of 175-190°C (350-375°F) to get a crispy, golden-brown exterior. For a single-fry method, aim for 170-175°C (340-350°F).
- Fish: To create a crispy coating while keeping the delicate fish moist, aim for 170-180°C (340-355°F).
- Croquettes & Breaded Items: Because these often have a filling that needs to cook or melt, you want a temperature that cooks the outside quickly without burning it. A range of 170-180°C (340-355°F) is ideal for most breaded items, including croquettes, chicken, and pork cutlets.
- Donuts: For a light, fluffy donut that cooks evenly without getting greasy, maintain a temperature of 180-190°C (355-375°F). This allows the outside to set quickly and prevents excessive oil absorption.
Remember that adding food to the oil will cause the temperature to drop, so it’s important to monitor it and adjust the heat as needed.
When to Change Your Oil
You know it’s time to change your oil when:
- It starts smoking at normal temperatures.
- It starts smelling or tasting off.
- It’s changed color significantly.
- It starts to foam up excessively.
- It’s gotten noticeably thicker.
Dealing with Common Frying Problems
Controlling Oil Splatter
Oil splattering is a common and dangerous problem when frying. It’s caused by water droplets coming into contact with the hot oil. To prevent this, make sure your food is as dry as possible before it goes into the oil. Here are some additional tips for controlling oil splatter:
- Use a Splatter Guard: This is the most effective and safest method. A splatter guard is a fine mesh screen that fits over your pan, allowing steam to escape while blocking oil droplets. .
- Add Salt or Flour: Adding a pinch of salt to the bottom of your pan before adding oil, or a pinch of flour to already-hot oil, can help. Both ingredients absorb some of the surface moisture, reducing the likelihood of splattering.
- Cover with a Lid: While it’s not ideal because it traps steam and can make your food soggy, a lid can be used to prevent splatter in a pinch. If you use a lid, be sure to open it away from your face to avoid a steam burn.
- Use Aluminum Foil: For deep frying, creating a barrier with aluminum foil around your fryer or pot can help contain splatters, keeping your stovetop clean.
Managing Cooking Smells
To reduce frying odors, place a cup of water with whole cloves or water with orange peel on the stove and let it simmer gently during the entire time you’re frying. To eliminate lingering smells after frying, heat a little cinnamon powder in a dry skillet, this will give off a delicious scent that cuts right through any frying odors. Also you can use oils with neutral scents, or choose oils that are marketed as low‑odor.
Cleaning Your Oil
After frying, you can often reuse your oil, but it’s important to clean it properly. This removes food particles and other impurities that can cause the oil to smoke, burn, or develop off-flavors. So once the oil has cooled, strain it through a fine-mesh sieve lined with a coffee filter or a few layers of cheesecloth. This removes small bits of breading or food that can burn in subsequent uses. For best results, strain it into a clean, airtight container and store it in a cool, dark place. But follow the guidelines above to know when its time to change your oil, you cant clean it forever, my basic rule on this is i clean once if im going to use for about the same thing, or else better use new oil.
Final Thoughts
The key to perfect fried breaded foods really comes down to understanding the science behind what’s happening and paying attention to details. Remember, most fried foods should be served immediately while they’re still hot, and always drain them on paper towels or draining racks before serving, fried foods taste much better when they’re not greasy.
Also don’t be afraid to experiment with different breadcrumb mixtures, seasonings, and techniques. Some of the best discoveries happen when you step outside the traditional flour-egg-breadcrumb routine. And remember, practice makes perfect, taste your first batch, adjust as needed, and don’t get discouraged if it takes a few tries to get it just right, just be safe and focused.
Whether you’re making classic chicken cutlets, fish and chips, or exploring more adventurous breaded creations, these techniques will help you achieve that perfect golden, crispy exterior with a tender, flavorful interior every single time. Now get out there and start frying!!!!! your taste buds will thank you!
Important Extra → If You Have a Kitchen Oil Fire
- Turn off the heat!
- Cover the pan or fryer.
- Do not use water.
- If the fire continues, use a Class K/B fire extinguisher.
- Evacuate and call emergency services!
When frying, always keep a lid (or another pan) nearby so you can smother a fire quickly. If you don’t have a lid, any metal pan or cover will work. It’s also wise to have a fire extinguisher or fire blanket within reach.
Discover more from BakeAfter
Subscribe to get the latest posts sent to your email.